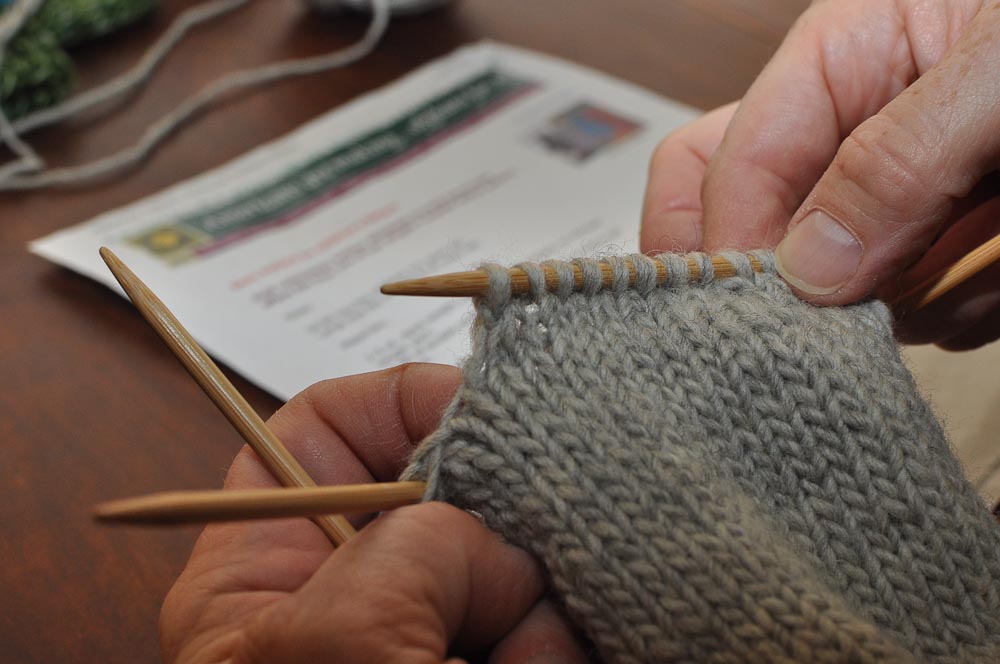
Now it's time for the top decreases. For the 40-stitch mitten, you will be decreasing in 5 segments. Arrange your stitches on your needles so each needle holds a multiple of 8. I hold my stitches on 3 needles, and work with the fourth, so my stitches are arranged 16-8-16.
Decrease as follows:
round 1: *k6, k2tog* around (35 sts)
round 2: knit
round 3: k5, k2 tog (30 sts)
round 4: knit
round 5: k4, k2 tog (25 sts)
round 6: knit
round 7: k3, k2 tog (20 sts)
round 8: knit
round 9: k2, k2 tog (15 sts)
round 10: k1, k2 tog (10 sts)
round 11: k2 tog (5 sts)
You will notice that once you've decreased to half your original number of stitches, you stop doing a plain row between decrease rows. This gives you a nicely rounded mitten tip.
Break yarn, leaving an end of 8-12 inches. Thread onto sewing-up needle. Working from right to left, transfer remaining 5 stitches onto sewing-up needle and pull yarn through.

Pull yarn through all 5 stitches again.

Now, snug up the top as tight as you can, distributing stitches evenly to avoid any wonky edges.

Plunge the sewing-up needles through the exact center of these tighened stitches.

Push it out through the side of the mitten.

Pull the needle and the yarn all the way through. Now, to avoid an unattractive pointy top, give that yarn a quick tug. You should end up with a nicely rounded top:
 |
| before (above) and after (below) |

Go to Part 4: The Thumb


I wish you would make a video of this! I've been looking for a video on how to close mittens but most patterns have that awful trapezoid shaped top and I cannot STAND the look of it! I would like to make my mittens rounded at the top like yours, but I'm really bad at following written directions and always learn much better by watching. I have a pattern I'm using (to make glittens, gloves with a convertible mitten top) but would like to change the technique she's written for closing the top. Might you help me?! I would be so appreciative! Thank you.
ReplyDeleteGloria, I am sorry, but we have no plans to make a video! We have been knitting since dinosaurs roamed the earth, and still photos are good enough for us. Have you tried to follow these directions, quietly and slowly, and without assuming you can't do it? I think you might find they work for you.
ReplyDeleteYou can easily apply this technique to your other pattern. When it's time to decrease for the top, divide the mitten into segments - I usually use 6, if that fits my number of stitches. but you can use 5 or 7 or any other number. Place markers to separate segments. K2 tog before each marker all the way around. Then knit a round plain. Alternate these two rounds until you have half the number of stitches you started with. Then start decreasing at the marker on every round. when you are down to 1 or 2 stitches in each segment, finish off as we describe.
Hope this helps.
My mitten came out wrong side out. I just turned it right side out and continued. Did I do something wrong?
ReplyDeleteI suspect you were knitting on the needle furthest away from you, so the Vs of the "knit" side form on the inside of the work. When you do that, the work travels in a clockwise direction. If you knit on the needle closest to you instead, the mitten will form right side out, and the work travels in a counterclockwise direction. Try it.
ReplyDeleteThank you very much for this tutorial. I used this pattern once last winter. The thumb gusset was new to me, but I just followed your directions, and ended up with two cute mittens:) The pattern plus this tutorial will be very helpful to our Guild at church. Our winter project is hats, cowls or scarves and mittens for the needy in our own community. Cynthia
ReplyDeleteThank you so much.
ReplyDeleteThank you for this; I’m winging my second pair of mittens ever without a pattern, per design requested by DS, and wanted a nice, round top for the liners that wouldn’t annoy fingers inside the outer shell. Just like a hat! Brilliant!
ReplyDeleteI am using your mitten pattern but going to turn them into a convertible open mitt by adding a lifeline so I have an opening to do so. But after knitting the gusset and knitting several rows up, I'm confused about the beg. k3 at the beg of the round as I've noticed my thumb gusset isn't on the exact side, but 3 stitches in. I'm doing it magic loop, so if the mitten gets turned slightly when finished to put the thumb on the side,
ReplyDeleteshouldn't I begin adding my lifeline thread, starting at skipping the first 3 stitches, as they will be on the back of hand and adding three more stitches going forward for total of 18?? Hope this doesn't sound dumb, but I'm thrown off now, noticing the extra 3 stitches at beg. Not sure why its written like that. Hope this makes sense. Jeanne
Thank you so much for these wonderful instructions! This made a beautiful rounded top on my mittens.
ReplyDeleteI am knitting a pair of mittens now but pattern for top is the trapezoid method and I want a more rounded top. I will try this pattern next but for ones I am working on now, how to I decrease with 54 stitches?
ReplyDelete